I titled this post simply because I think a lot of people are looking for examples of IKEA kitchen remodels. At least that’s what I was looking for when I was doing this project, but I couldn’t find too many examples. So I’m adding one to the ether 🙂

Our remodel is about one year old. The finishing touches were completed while I was in the hospital after the birth of my second child. Talk about having a hard stop for a project! I told the contractors (nicely) that, though they were doing a fantastic job, I didn’t want to see their faces once I came home with the baby. They were very kind and professional and pulled out all the stops to oblige.
We did the kitchen reno – which I’d been contemplating almost as soon as we saw the house – after about a year of being in our new house. The previous kitchen (pictured below) was not my style. We have a ton of windows in and around our kitchen, yet the space always looked dark. Brown wood cabinets and a brownish rust-colored floor added to the darkness and didn’t go well with the deep neutral gray paint I’d chosen (Summit Gray by Sherwin Williams) or our decor.

Before – Sink side of the kitchen. 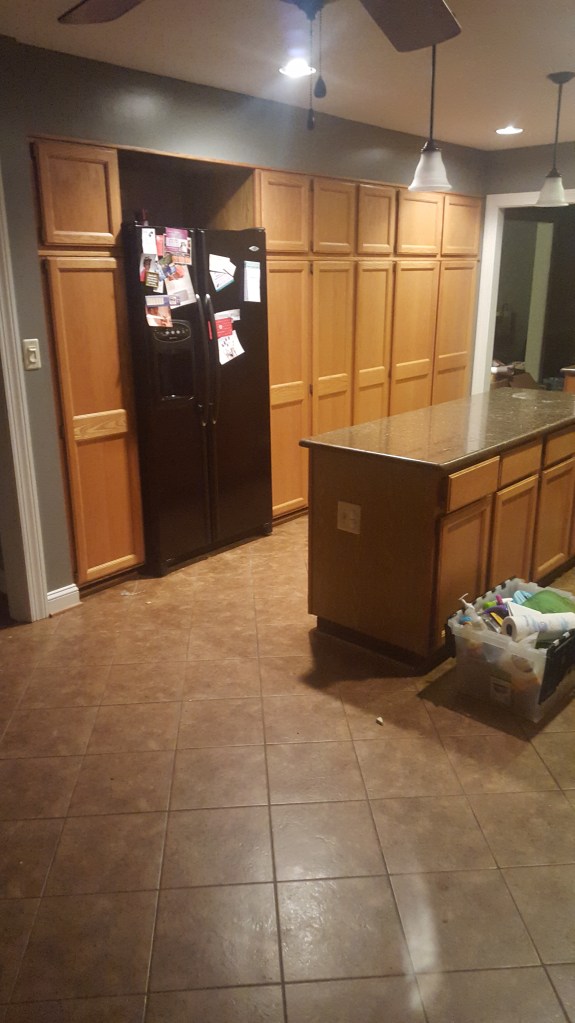
Before – Pantry side of the kitchen. The different sizes of the six pantry cabinets made storage inefficient. 
Before – Island into eating nook.
When I started brainstorming the direction I’d go with the reno, I immediately thought of IKEA. I used them to remodel the kitchen in my condo in 2012. I always felt like every dollar of that project was well spent. I injected practical elements that made my day run smoother and I just loved the way the space looked. I’m always in the kitchen and being in a customized space made that time even more fun. The experience sort of ruined me for having a kitchen that didn’t have my stamp on it.
Doing an IKEA remodel is not for everybody. For example, my mother’s worst nightmare would be repeated trips to IKEA. I’d guess it’s the built-in meandering flow of an IKEA store that gets people. But I pass my local IKEA on my way home from work, so mid-week stops were easy and fuss free. Regular trips to the store also build your familiarity, and you learn a bunch of hacks like short-cuts to the Kitchen department, where to park for returns, the fastest route to the check-out counters, etc.
I used IKEA’s local installation contractor, Traemand, for the project – the same company that had installed my condo kitchen. They started on October 16 and wrapped on November 28 – it took approximately six weeks. This was considerably longer than I was anticipating based on the lightning-fast timeline they stuck to for the remodel in the condo (five actual working days spread over two weeks). But a few elements stretched out the timeline for the house:
- Our house kitchen is bigger. More demo, more installation, more time to complete the project.
- We got quartz countertops. The countertop templating and installation process took roughly two weeks to complete. In the condo, we’d used laminate countertops (gray with an aluminum finish). Going with an option that was in stock at the IKEA store shaved so much time off of the first go round.
- Our life at the time was a whirlwind. During this remodel, we had busy jobs and a toddler with a second child on the way. Everything, from email exchanges with the contractors to trips to and from IKEA, Home Depot, Floor and Decor, etc. took a HNL (“Hole ‘Notha Level,” as they say) of orchestration and coordination. It was hype and I’m sure all the juggling added a day or two to the process because of lack of efficiency.
The new space is brighter, reflects light so much better and feels fresh. We sourced most of the materials from IKEA: the cabinets, the L-shaped quartz portion of the countertop, the sink and drawer handles and cabinet pulls. One of my favorite things about IKEA kitchens are all the choices for how you store your stuff. We chose all drawers for the island (instead of cabinets). Each of the three equally sized pantry cabinets on the right of the fridge have five deep drawers that pull all the way out. This makes it a cinch to reach everything in the back of the drawers. Everything is soft close.

After – The kitchen post-reno. 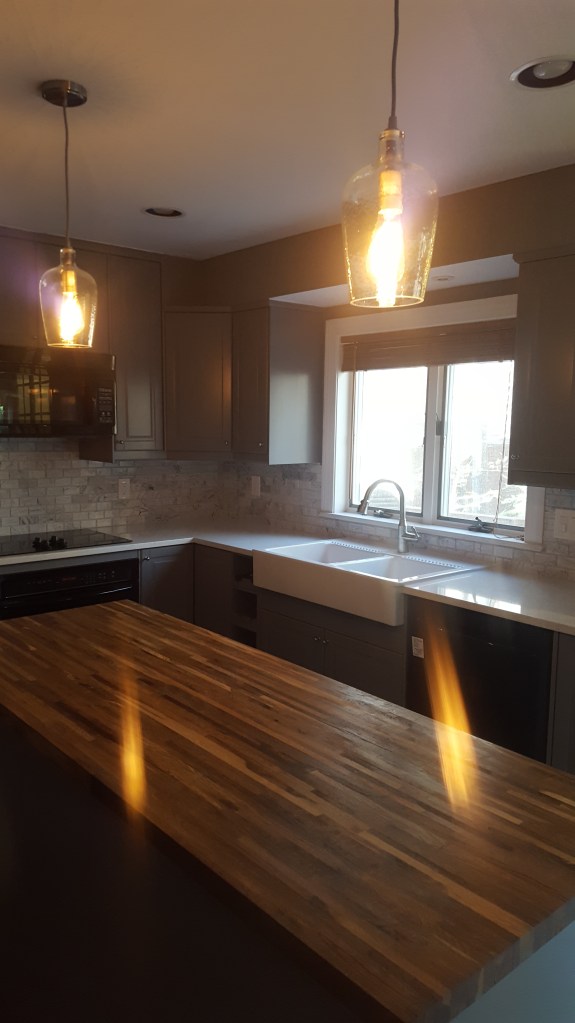
After – Stove, sink and quartz countertop. 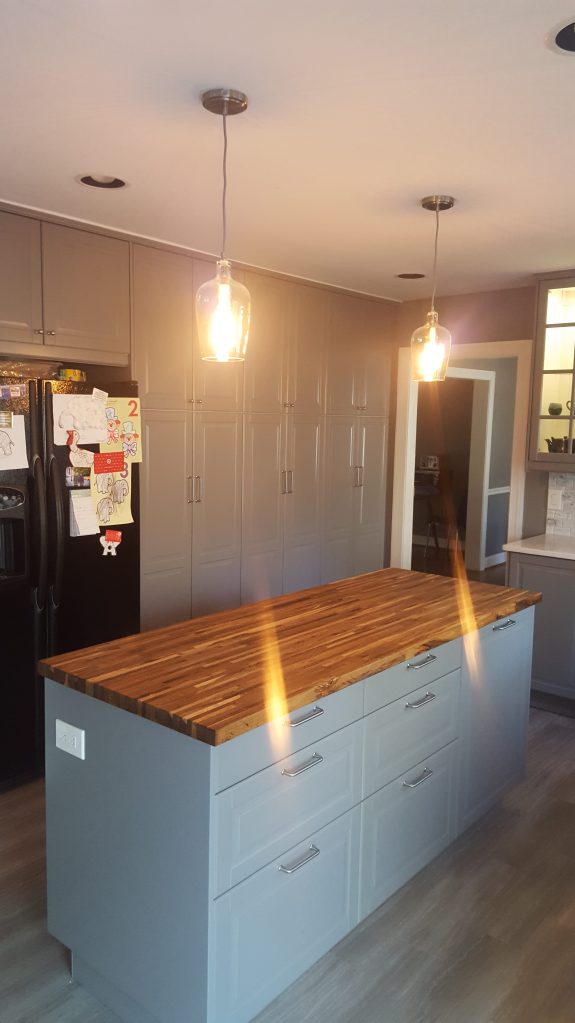
After – Pantry side of the kitchen post reno. I guess I should’ve taken my two year old’s artwork off the fridge ;p 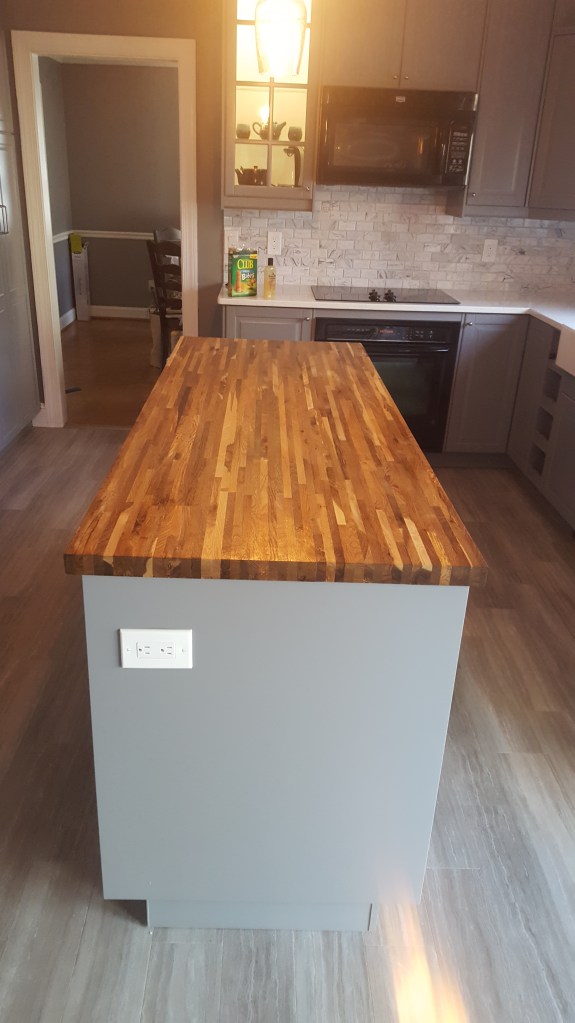
After – Fumed oak island after finishing.
We went with vinyl floors. I can’t count how many dishes we lost to the previous tile floors. Vinyl is more in line with our two-boy household. I couldn’t find a link to the exact vinyl plank flooring we used, but this one is similar.
We went with Floor & Decor for the backsplash. Their selection blew me away. Every type of HGTV-worthy backsplash that you could imagine was in that showroom. I was a hard choice because I loved so many of them. In the end, we went with a smallish, beveled marble subway tile, a great finishing touch.
We also got a butcher block countertop from Floor & Decor. IKEA had a walnut countertop that I really wanted. But our island was a little bigger than their standard size, so I had to look elsewhere. I found a really pretty walnut butcher block countertop at F & D that caught my eye, but upon further investigation, that one was sold out.
I ultimately went with a fumed oak countertop. I contemplated staining it a darker color, but because most stains aren’t food safe and I had to prioritize practicality over look. I ended up simply using a wood conditioner and food-safe butcher block sealer to “finish” it. The fuming process brings out some of the deeper tones in the wood so we wound some really interesting variations, including some nice, rich browns.
What we kept? All of our appliances. Though I’m no fan of the side-by-side refrigerator, I appreciate that the appliance purchases that the previous home owner made. The concept of throwing out functional appliances seemed wrong. Plus, purchasing a new set of appliances at the same time as the reno would have taken this project from expensive to out of reach. Appliances cost a pretty penny! (Thanks Captain Obvious.) I also like black appliances (gasp!) and might have even considered replacing them with another set of black ones…or black stainless. As our current appliances end their life cycle, we’ll replace them with something updated.
The project was pretty much finished before we went into the hospital to have the baby. We brought him home to a functional space that looks and feels like our style. Just a year in and the investment is already paying off. And I’m right back to loving every minute I spend in my kitchen. I highly recommend giving an IKEA kitchen a go!
